










When you dream of waking up with effortlessly smooth, shiny, and frizz-free hair, the allure of a professional keratin treatment is strong. However, the cost and time commitment can be prohibitive. Fortunately, as of May 2026, the market offers a strong selection of at-home keratin treatment kits that bring salon-worthy results within reach.
These kits promise to tame unruly strands, enhance manageability, and impart a healthy gloss, all from the comfort of your own bathroom. But not all kits are created equal. Navigating the options requires understanding the science, the application process, and what to expect. This guide dives deep into the best keratin treatment at home kits available now, helping you make an informed choice for your best hair yet.
The desire for smooth, manageable hair is universal, and keratin treatments have long been the gold standard for achieving this. While professional treatments are effective, their price point and the need for salon visits often put them out of reach for many. This is where the best keratin treatment at home kits step in, offering a more accessible and convenient solution. As of 2026, these DIY options have advanced significantly, providing impressive results without the hefty cost or salon appointment.
- At-home keratin kits offer a cost-effective alternative to salon treatments for smoothing hair and reducing frizz.
- As of 2026, formulations have improved, with many formaldehyde-free options available.
- Success depends on choosing the right kit for your hair type and following application instructions meticulously.
- Expect results to last between 4-12 weeks, depending on the product and your hair care routine.
- Proper aftercare, including using sulfate-free shampoos, is crucial for extending treatment longevity.
What Exactly is Keratin and How Does it Work?
Keratin is a naturally occurring protein that forms the primary building block of your hair, skin, and nails. It’s what gives hair its structure, strength, and elasticity. Over time, external factors like heat styling, environmental damage, and chemical processing can deplete your hair’s natural keratin levels, leading to dryness, breakage, and frizz.
At-home keratin treatments work by infusing your hair shafts with a synthesized form of keratin. When applied, the treatment typically involves a cleansing shampoo to open the hair cuticle, followed by the keratin solution. Heat, often from a flat iron, is then used to seal the keratin into the hair shaft. This process effectively smooths the hair cuticle, reducing friction, eliminating frizz, and making hair appear sleeker and more reflective. The result is hair that’s significantly more manageable and looks healthier.
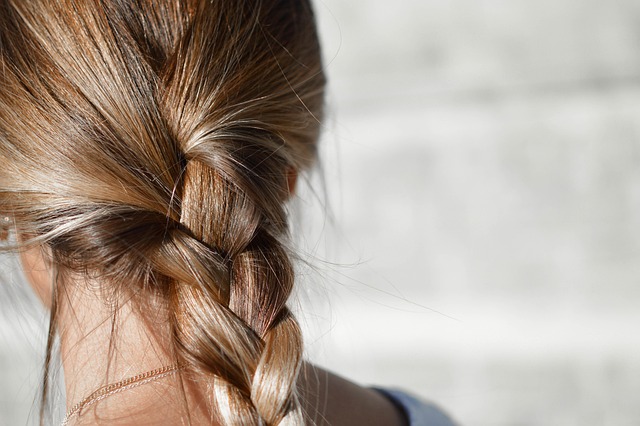
The key benefit is the temporary filling of gaps and damage within the hair cuticle. Unlike permanent straightening methods, keratin treatments are semi-permanent, gradually washing out over several weeks. This makes them a less commitment-heavy option for those seeking smoother hair.
Why Choose an At-Home Keratin Treatment?
The primary driver for opting for an at-home keratin treatment is its cost-effectiveness. Professional salon treatments can range from $200 to $600 or more, depending on hair length and salon pricing. In contrast, most at-home kits fall between $50 and $150, offering significant savings.
Beyond the financial aspect, convenience is a major plus. You can schedule your treatment whenever it suits you, without needing to book salon appointments weeks in advance. For individuals with busy schedules or those who prefer privacy, performing the treatment at home offers unparalleled flexibility. As of May 2026, many brands have refined their formulas, offering safer, more user-friendly products with reduced application times and less intense fumes compared to older formulations.
A 7NEWS article from May 2026 highlighted an editor’s experience with an $82 at-home kit, noting its effectiveness in smoothing hair without the salon price tag. This reflects the growing trend of sophisticated DIY beauty solutions that deliver professional-level results.
Types of At-Home Keratin Kits Available
At-home keratin treatments generally fall into a few categories, primarily distinguished by their active ingredients and application complexity.
Formaldehyde-Based vs. Formaldehyde-Free Formulas
Historically, keratin treatments relied on formaldehyde or formaldehyde-releasing compounds to create the smoothing effect. Formaldehyde is a potent chemical that helps to restructure the hair bonds. However, due to health concerns regarding inhalation of fumes during application and potential long-term effects, there’s a strong market shift towards formaldehyde-free options.
Formaldehyde-free kits typically use alternative ingredients like glyoxylic acid, keratin derivatives, or amino acids to achieve similar smoothing results. While they might require slightly longer application times or may not offer the same extreme level of straightening as older formaldehyde-based formulas, they are significantly safer for home use. According to the Cosmetic Ingredient Review (CIR) Expert Panel, while formaldehyde is a known carcinogen, its presence in hair products is regulated, but consumer preference has driven innovation in safer alternatives.
Express vs. Traditional Smoothing Treatments
Express Treatments: These are designed for quicker application, often taking 30-60 minutes to apply. The results are typically less intense than traditional treatments and may last for a shorter duration, usually 4-6 weeks. They are ideal for those who want a quick frizz-busting boost or are new to at-home keratin treatments.
Traditional Treatments: These kits usually require a longer application process, sometimes up to 2-3 hours, including processing and rinsing times. They are formulated for more significant smoothing and frizz reduction and can last anywhere from 8 to 12 weeks. These are better suited for individuals with very coarse, curly, or extremely frizzy hair who seek a more dramatic and long-lasting transformation.
Kits Tailored for Specific Hair Types
Some brands now offer kits specifically formulated for different hair types. You might find options designed for:
- Fine Hair: Lighter formulas that provide smoothing without weighing hair down.
- Thick/Coarse Hair: More potent solutions to penetrate and smooth stubborn textures.
- Color-Treated/Chemically Processed Hair: Gentler formulas with added conditioning agents to minimize further damage.
- Curly Hair: Treatments that enhance curl definition while reducing frizz, rather than aiming for complete straightening.
Choosing a kit tailored to your hair type can significantly improve results and minimize potential damage.
How to Choose the Best Keratin Treatment at Home Kit for You
Selecting the right kit involves considering several factors to ensure you get the desired results safely and effectively.
1. Assess Your Hair Type and Concerns
Is your hair fine, thick, curly, straight, color-treated, or damaged? Identify your primary concern: frizz, unruliness, lack of shine, or overall smoothness. Kits formulated for specific hair types or concerns will yield better outcomes. For instance, if you have fine, limp hair, avoid heavy, intensive treatments that might flatten it excessively.
2. Read Ingredient Lists Carefully
Prioritize formaldehyde-free formulas. Look for keratin, hydrolyzed keratin, amino acids, and natural extracts. Be wary of treatments that list formaldehyde, formalin, or methylene glycol as primary active ingredients, especially if you are sensitive or concerned about fumes. The Environmental Working Group (EWG) provides extensive data on chemical safety in cosmetics, noting concerns about formaldehyde’s potential health impacts.
3. Evaluate Application Process and Time
Consider how much time you’re willing to dedicate. Express treatments are quicker but may offer less dramatic or shorter-lasting results. Traditional treatments require more time but provide more significant smoothing. Review the steps involved: are they straightforward, or do they require multiple complex stages?
4. Check Reviews and Brand Reputation
Look for reviews from users with similar hair types and concerns. Pay attention to comments about the ease of application, scent, effectiveness, longevity of results, and any adverse reactions. Established brands with a track record in hair care often offer more reliable products and better customer support.
5. Consider Your Budget
While at-home kits are significantly cheaper than salon treatments, prices can vary. Determine how much you’re comfortable spending, keeping in mind that a higher price doesn’t always guarantee better results, but very cheap kits might compromise on quality or safety.
Top Keratin Treatment at Home Kits for 2026
Based on user reviews, ingredient innovation, and reported effectiveness, here are some of the best keratin treatment at home kits available as of May 2026:
1. Keratin Complex Smoothing Therapy (e.g., Keratin Complex Infusion Keratin Replenisher)**
Keratin Complex is a well-respected brand in the keratin treatment space, offering professional-grade formulas that are also accessible for home use. Their kits are known for their effectiveness in reducing frizz and adding shine. Many of their products are designed to be used with heat, such as a flat iron, to seal the treatment into the hair cuticle for optimal results.
Pros: Highly effective for smoothing and frizz control, extends the life of salon blowouts, professional-grade results. Often available in various sizes for different hair lengths.
Cons: Can be more expensive than other at-home kits, requires precise application and heat styling, some older formulas may contain formaldehyde derivatives (ensure you check the specific product label for 2026 formulations).
2. Cocochoco Professional Keratin Treatment
Cocochoco is praised for its pure keratin formula, free from formaldehyde and harsh chemicals. This kit is often highlighted for its ability to significantly reduce frizz and curls, making hair appear smoother and more manageable. It typically involves a multi-step process that includes a clarifying shampoo, the keratin treatment application, and heat sealing.
Pros: Formaldehyde-free, effective for significant smoothing and frizz reduction, results can last up to 3 months with proper care. Pleasant scent compared to traditional treatments.
Cons: Application can be time-consuming (2-3 hours total), requires careful adherence to instructions, can be overwhelming for first-time users. Proper ventilation is still recommended.
3. GK Hair The Best Keratin Treatment
GK Hair offers a range of keratin treatments, with ‘The Best’ being a popular choice for its blend of keratin and other proteins designed to fortify hair. It aims to smooth frizz, repair damage, and add shine. Many users report a noticeable difference in hair texture and manageability after just one use. It’s often noted for its ability to reduce styling time.
Pros: Contains Juvexin, a keratin blend designed for repair and smoothing, effective frizz control, improves hair strength and shine. Can be used on various hair types, including color-treated hair.
Cons: May contain some formaldehyde-releasing agents depending on the specific formulation (always check labels), results might be less dramatic on extremely curly hair compared to salon treatments.
4. Mini-Keratin Express Smoothing Treatment
For those seeking a quicker solution, the Mini-Keratin Express Smoothing Treatment is often recommended. These kits are designed for faster application, typically around 30-60 minutes, and provide frizz reduction and enhanced shine for several weeks. They are a good entry point for individuals new to keratin treatments or those who don’t need extremely long-lasting results.
Pros: Quick application time, easy to use, suitable for all hair types, provides a good boost of smoothness and shine, budget-friendly option.
Cons: Results are less intense and shorter-lived (4-6 weeks) than traditional treatments, may not be sufficient for very coarse or frizzy hair.
5. Pravidla Professional Keratin Treatment
Pravidla is a brand that focuses on natural ingredients, and its keratin treatment aims to deliver smoothing benefits with a gentler approach. Often formulated with plant-based extracts and hydrolyzed keratin, it seeks to repair and strengthen hair while reducing frizz. User feedback often praises its milder scent and less irritating application.
Pros: Formulated with natural ingredients, formaldehyde-free, generally gentler on hair and scalp, provides good smoothing and frizz control for moderate frizz. Often includes nourishing botanical extracts.
Cons: May not be potent enough for very resistant or severely damaged hair, results might be less dramatic than chemical-heavy treatments, availability can be limited.
Step-by-Step: Applying Your At-Home Keratin Treatment
Achieving salon-quality results at home hinges on meticulous application. Always follow the specific instructions provided with your chosen kit, as steps can vary. Here’s a general guideline:
- Prepare Your Hair: Start by washing your hair thoroughly with a clarifying shampoo. This removes any product buildup, oils, and impurities that could prevent the keratin from penetrating effectively. Don’t use conditioner.
- Dry Your Hair: Gently towel dry your hair until it’s about 80-90% dry. Then, blow-dry it completely until it’s smooth and all moisture is removed.
- Section Your Hair: Divide your hair into manageable sections using clips. This ensures even application of the treatment.
- Apply the Treatment: Wearing gloves and working in a well-ventilated area, begin applying the keratin solution to each section, starting about half an inch from the scalp and working down to the ends. Use a brush to distribute the product evenly. Avoid saturating the hair; a light, even coat is sufficient.
- Process the Treatment: Let the treatment sit on your hair for the time specified in the kit’s instructions (typically 20-60 minutes for express treatments, up to 2-3 hours for traditional ones). Some kits may require you to wear a processing cap.
- Blow-Dry and Flat Iron: Once the processing time is complete, blow-dry your hair completely smooth using medium heat. Then, using a flat iron set to the appropriate temperature (usually 400-450°F or 200-230°C), slowly pass over small sections of hair 5-7 times. This step is crucial for sealing the keratin into the hair shaft.
- Rinse and Condition (if required): Some kits require you to rinse the hair after flat ironing, while others recommend leaving the treatment in for a specified period (e.g., 72 hours) before the first wash. Follow your kit’s instructions precisely. If rinsing, use a sulfate-free shampoo and conditioner.

Proper ventilation is crucial, especially with treatments that may release mild fumes, even if they are formaldehyde-free. Open windows or use a fan.
Aftercare: Maximizing Your Keratin Treatment’s Lifespan
The longevity of your at-home keratin treatment depends heavily on your aftercare routine. To keep your hair smooth and frizz-free for as long as possible:
1. Use Sulfate-Free Products
Sulfates are harsh detergents that strip natural oils and can accelerate the washout of keratin treatments. Always opt for shampoos and conditioners specifically labeled ‘sulfate-free’ and ‘sodium chloride-free’. According to the American Academy of Dermatology, gentle cleansing is vital for maintaining hair health and the integrity of treatments.
2. Limit Exposure to Chlorine and Salt Water
Chlorinated pool water and saltwater from the ocean can degrade the keratin treatment faster. If you plan to swim, wet your hair with regular tap water and apply a leave-in conditioner or a protective oil beforehand. Rinse your hair thoroughly immediately after swimming.
3. Adhere to the Waiting Period
Most kits advise waiting a specific period (often 72 hours) after the final flat ironing step before washing your hair. During this time, the keratin continues to bond with your hair. Avoid tying your hair back tightly, tucking it behind your ears, or using hairpins, as this can create unwanted dents or creases.
4. Minimize Heat Styling
While the treatment makes hair smoother, excessive heat styling can still damage it over time. Use heat protectant sprays and opt for lower heat settings when possible. Embrace your hair’s natural smoothness and reduce reliance on blow dryers and flat irons.
5. Regular Deep Conditioning
Even with keratin, your hair benefits from regular deep conditioning treatments to maintain moisture and health. Choose masks formulated for dry or damaged hair, ensuring they are also sulfate-free.
Common Mistakes to Avoid with At-Home Keratin Treatments
Applying a keratin treatment at home can be straightforward, but certain missteps can lead to disappointing results or even damage.
1. Not Following Instructions Precisely
Each kit has unique requirements for application time, heat settings, and post-treatment care. Deviating from the manufacturer’s guidelines is the most common reason for suboptimal results. For example, not using enough heat during the flat ironing stage can prevent the keratin from sealing properly.
2. Applying Too Much Product
Over-applying the keratin solution can lead to greasy-looking hair or make it difficult to rinse out completely, potentially weighing down fine hair. A thin, even coating is sufficient to coat each strand.
3. Skipping Ventilation
Even formaldehyde-free treatments can release mild fumes. Formaldehyde-based products emit significant fumes. Inadequate ventilation can lead to headaches, dizziness, or respiratory irritation. Always perform the treatment in a well-ventilated space, ideally near an open window or with a fan running.
4. Using the Wrong Shampoo Afterwards
Using a regular shampoo containing sulfates or sodium chloride immediately after the waiting period will strip the keratin from your hair, significantly reducing the treatment’s lifespan and effectiveness. Stick strictly to sulfate-free and sodium chloride-free options.
5. Flat Ironing Incorrectly
The flat ironing step is critical for sealing the keratin. Using too low a temperature, not making enough passes, or not doing so on small, clean sections can result in a treatment that washes out quickly or doesn’t smooth effectively. Ensure your flat iron is clean and reaches the recommended temperature.
Frequently Asked Questions About At-Home Keratin TreatmentsAre at-home keratin treatments safe?
Yes, when used according to instructions and preferably using formaldehyde-free formulas. Always ensure good ventilation. If you have very sensitive skin or scalp conditions, a patch test is recommended.
How long do at-home keratin treatments typically last?
Results from at-home kits generally last between 4 to 12 weeks, depending on the product’s potency, your hair type, and how well you follow the aftercare instructions.
Can I color my hair after a keratin treatment?
It’s generally recommended to wait at least 1-2 weeks after a keratin treatment before coloring your hair to allow the keratin to fully bond and to avoid color stripping or alteration.
Will keratin treatments straighten my hair permanently?
No, keratin treatments are semi-permanent. They smooth and reduce frizz, making hair more manageable, but they don’t permanently alter the hair’s structure like a chemical relaxer or perm.
What if my hair feels greasy after the treatment?
This can happen if too much product was applied or not rinsed thoroughly. Ensure you use a sulfate-free shampoo and conditioner, and consider a lighter application next time. A deep clarifying (but sulfate-free) shampoo can help remove excess buildup.
Can I use a keratin treatment on damaged hair?
Yes, many keratin treatments can help improve the condition of damaged hair by smoothing and strengthening it. However, choose gentle, nourishing formulas, and always perform a strand test if your hair is severely compromised.
Conclusion: Your Path to Smoother Hair
The world of at-home beauty treatments has evolved dramatically, and the best keratin treatment at home kits in 2026 offer a powerful, accessible way to achieve the sleek, frizz-free hair you desire. By understanding the science behind keratin, carefully selecting a kit suited to your hair type and concerns, and diligently following the application and aftercare instructions, you can replicate salon-quality results in your own home.
Actionable Takeaway: Prioritize formaldehyde-free formulas and meticulous application. For your first at-home keratin treatment, start with an express kit from a reputable brand to gauge your hair’s response and build confidence before moving to more intensive options.