


Keeping Your Jordans Pristine in 2026
Maintaining the iconic look of your Air Jordan 1s is crucial for any sneaker enthusiast. As of May 2026, the classic silhouette remains a staple in streetwear, but keeping them box-fresh requires diligent care. This complete guide will walk you through how to clean Jordan 1 sneakers at home, ensuring they retain their value, and aesthetic appeal.
Last updated: May 29, 2026
Most sneaker heads know that a dirty pair of Jordans can detract from any outfit. However, many are hesitant to clean them themselves, fearing damage or simply not knowing where to start. This guide demystifies the process, offering step-by-step instructions and expert tips to restore your favorite pair.
- Gather essential cleaning supplies: mild soap, soft brushes, microfiber cloths, and water.
- Address different materials (leather, suede, canvas) with appropriate techniques and products.
- The sole can be cleaned effectively with a magic eraser or specialized sole cleaners.
- Avoid machine washing or harsh chemicals, which can damage the sneaker’s structure and materials.
- Consistent, gentle cleaning is key to long-term preservation of your Jordan 1s.
Essential Arsenal: What You Need to Clean Your Jordan 1s
Before diving into the cleaning process, assembling the right tools is paramount. Using the correct supplies ensures effectiveness without causing damage. Think of this as preparing your surgical kit for delicate, high-value footwear.
For most Jordan 1 cleaning tasks, you’ll need a selection of items readily available around the house or easily purchased from a local store. The key is gentleness; harsh scrubbing or abrasive materials can ruin the leather, stitching, or sole.
- Mild Cleaning Solution: A mixture of lukewarm water and a small amount of mild soap (like dish soap or a dedicated sneaker cleaner) works best. Avoid harsh detergents.
- Soft Bristle Brushes: A soft-bristled toothbrush is ideal for detailed work, while a dedicated sneaker cleaning brush with slightly firmer bristles can tackle tougher grime on midsoles.
- Microfiber Cloths: Essential for wiping down surfaces, drying, and applying cleaning solutions without scratching. Have at least two on hand – one for cleaning, one for drying.
- Water Source: A bowl of clean water for rinsing brushes and cloths.
- Magic Eraser (Optional): Excellent for deep cleaning white rubber soles and midsoles, but use with caution to avoid damaging painted details or certain finishes.
- Suede Cleaner and Brush (if applicable): If your Jordan 1s feature suede panels, specialized tools are a must to avoid matting or discoloration.
Having these items ready ensures you can tackle dirt, scuffs, and stains efficiently. The specific cleaner concentration can be adjusted based on the severity of the dirt, but always start with a weaker solution.

Step 1: Pre-Cleaning Preparation
The first step in how to clean Jordan 1 sneakers at home is preparation. This involves removing loose dirt and debris, which prevents it from being ground further into the materials during the main cleaning process.
This stage is crucial for efficient cleaning. Imagine trying to wash a car without rinsing off the loose dust first – you’d just be spreading mud around. The same principle applies to your Jordans.
- Remove Laces: Carefully unlace your Jordan 1s. How to clean jordan 1 sneakers at home allows for a more thorough cleaning of the tongue area and eyelets.
- Dry Brush: Use a dry, soft-bristled brush (or even a clean toothbrush) to gently brush away any loose dirt, dust, or mud from the entire shoe – upper, midsole, and outsole. Pay attention to creases and seams where dirt tends to accumulate.
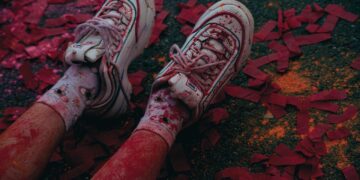
- Inspect for Stains: Take a moment to identify any specific stains or problem areas. Knowing what you’re dealing with helps you choose the most effective approach.
This simple dry brushing step removes surface-level grime, making the subsequent wet cleaning much more effective. It prevents turning loose dirt into a paste that’s harder to remove later.
Step 2: Cleaning the Upper – Material Matters
The upper of the Jordan 1 is typically made from leather, but some variations incorporate suede, nubuck, or canvas. Each material requires a slightly different approach to avoid damage and achieve the best results.
Treating different materials incorrectly is one of the most common mistakes people make when cleaning their sneakers. For instance, using water liberally on suede can lead to permanent matting and discoloration. Understanding these nuances is key to successful DIY Jordan 1 cleaning.
Leather Uppers
Most Jordan 1s feature durable leather. For these, a gentle cleaning solution is your best friend. Mix a few drops of mild soap with lukewarm water.
Dip your soft brush or a microfiber cloth into the solution, wring out excess liquid, and gently scrub the leather in circular motions. Focus on soiled areas. Wipe away the soapy residue with a clean, damp microfiber cloth, then dry thoroughly with a separate, dry cloth.

Suede and Nubuck Uppers
Suede and nubuck are more delicate. Never use water-based cleaners directly on them. Instead, use a specialized suede brush to lift dirt and restore the nap. For tougher stains, a suede eraser or a dedicated suede cleaner is recommended.
Always brush in one direction to maintain the texture. If using a suede cleaner, follow the product’s instructions carefully, usually involving applying a small amount and then brushing.
Canvas Uppers
Canvas is quite resilient but can absorb stains. Use a similar mild soap and water solution as for leather, but apply it with a cloth rather than a brush to avoid excessive saturation.
Work the solution into the canvas gently. Wipe clean with a damp cloth and dry thoroughly. For stubborn marks, a paste of baking soda and water can sometimes work, but test in an inconspicuous area first.
For any material, avoid soaking the shoe. Excessive moisture can damage adhesives and the internal structure of the sneaker, leading to premature wear.
Step 3: Tackling the Midsoles and Outsoles
The rubber midsoles and outsoles of Jordan 1s are often the first areas to show significant wear and tear, collecting dirt, scuffs, and grime.
The rubber components of your Jordan 1s can accumulate a surprising amount of dirt. Restoring them can dramatically improve the overall appearance of the shoe, making them look almost new again. This is where a little elbow grease pays off.
Midsole Cleaning
For the rubber midsole, your mild soap and brush are a good starting point. Scrub gently in circular motions. If stubborn scuffs or yellowing persist, a magic eraser can be highly effective.
When using a magic eraser, dampen it slightly and rub gently over the affected areas. Be cautious around painted details or logos on the midsole, as excessive rubbing can remove them. Always test on a small, hidden area first.
Outsole Cleaning
The outsole (the bottom tread) collects the most dirt. Use your brush and soapy water to scrub the grooves thoroughly. For very deep-set dirt, a toothpick or the edge of a plastic card can help dislodge it.
If your outsoles are particularly grimy or stained, a dedicated sneaker sole cleaner can be very effective. These are formulated to lift dirt without damaging the rubber. After cleaning, wipe the outsoles clean with a damp cloth.

Step 4: Don’t Forget the Laces and Insoles
Often overlooked, clean laces and insoles significantly contribute to the overall fresh appearance of your Jordan 1s.
Dirty laces can make an otherwise clean sneaker look neglected. Similarly, smelly insoles can ruin the experience of wearing your favorite pair. Addressing these often-forgotten components is key to a complete clean.
Lace Care
The easiest way to clean laces is to remove them and wash them by hand in a bowl of soapy water. You can also place them in a mesh laundry bag and wash them with your whites in the washing machine. Avoid the dryer, as heat can damage synthetic laces.
Once clean, lay them flat to air dry completely before re-lacing your sneakers. Properly cleaned laces make a surprising difference to the shoe’s overall look.
Insole Care
Insoles can absorb sweat and odor. For most Jordan 1s, the insoles are removable. You can gently clean them with a damp cloth and a small amount of mild soap. Avoid saturating them.
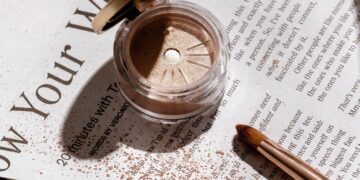
Allow insoles to air dry completely before putting them back in the shoes. For persistent odors, you can sprinkle a small amount of baking soda on them overnight, then brush it off in the morning. Alternatively, consider using sneaker deodorizer sprays or replacement insoles.
Step 5: Proper Drying and Final Touches
Drying your Jordan 1s correctly is as important as cleaning them. Improper drying can lead to water stains, material damage, or even mold.
Rushing the drying process or using heat sources can cause irreversible damage. Patience during this stage ensures your hard work pays off and your sneakers remain in prime condition for future wears. According to sneaker care experts, air-drying is universally recommended.
- Air Dry Naturally: Never place your Jordan 1s in a clothes dryer, near a direct heat source (like a radiator or hairdryer), or in direct sunlight for extended periods. These methods can warp materials, crack glue, and fade colors.
- Stuffing for Shape: Stuff the shoes loosely with white paper towels or shoe trees to help them retain their shape and absorb internal moisture. Avoid using newspaper, as the ink can transfer to the lining.
- Ventilation is Key: Place the shoes in a well-ventilated area at room temperature. How to clean jordan 1 sneakers at home allows moisture to evaporate naturally.
- Patience: Depending on humidity and temperature, drying can take anywhere from 12 to 48 hours. Ensure they are completely dry before wearing or storing.
Once dry, re-lace your Jordan 1s with your freshly cleaned laces. For any minor scuffs on leather that remain, a leather conditioner can be applied to restore moisture and shine.

Common Mistakes to Sidestep When Cleaning Jordan 1s
Even with the best intentions, certain cleaning practices can inadvertently damage your valuable sneakers. Awareness of these common pitfalls is key to effective home cleaning.
Many sneaker enthusiasts, especially those new to caring for premium footwear, fall prey to these common errors. They often stem from treating all shoes the same or opting for quick-fix solutions that prove detrimental long-term.
- Washing Machine Mishaps: Never put Jordan 1s in a washing machine. The agitation, heat, and detergent can destroy the shoe’s structure, detach soles, and damage delicate materials.
- Harsh Chemicals: Bleach, strong solvents, and abrasive cleaners can strip colour, degrade materials, and cause permanent damage. Stick to mild, sneaker-specific, or pH-neutral cleaners.
- Excessive Water: Over-saturating the shoes can weaken adhesives, warp the shape, and promote mold growth. Always use cleaning solutions sparingly.
- Improper Drying: As mentioned, heat sources and direct sunlight are detrimental. Always opt for natural air-drying.
- Ignoring Material Specifics: Using the same cleaning method for leather, suede, and canvas will likely damage at least one of them. Always tailor your approach to the material.
- Scrubbing Too Hard: Aggressive scrubbing, especially on leather or painted midsoles, can cause scuffs, remove finishes, or even tear materials.
By avoiding these mistakes, you significantly increase the lifespan and maintain the aesthetic integrity of your Jordan 1 sneakers.
Advanced Techniques for Stubborn Stains and Wear
Sometimes, standard cleaning isn’t enough. For deeper stains or significant wear, a few advanced techniques can make a difference.
Restoring heavily worn or stained Jordan 1s requires patience and the right approach. These methods are for when the basic cleaning steps aren’t sufficient to bring your sneakers back to their former glory.
- Tar and Gum Removal: For sticky residues, try freezing the affected area slightly. Once chilled, the substance may harden and be easier to scrape off with a plastic card. Alternatively, a small amount of Goo Gone (test first!) can work, but ensure it’s fully removed.
- Yellowing Soles: Persistent yellowing on rubber soles can sometimes be treated with a sole-reviving product containing hydrogen peroxide. This often involves applying the product, wrapping the sole in plastic wrap, and exposing it to UV light (like sunlight) for several hours. This process requires caution and careful adherence to product instructions. According to some sneaker restoration guides, this process can be effective but carries a risk of uneven results if not done properly.
- Ink Stains: For ink on leather, try a cotton swab lightly dipped in isopropyl alcohol. Dab gently and blot immediately with a clean cloth. Test in an inconspicuous area first, as alcohol can sometimes affect dyes.
- Deep Cleaning Creases: For heavily creased leather, a very soft brush with a slightly more concentrated mild soap solution can help lift dirt from the folds. A leather conditioner after cleaning is highly recommended to prevent further cracking.
Remember, these advanced techniques carry a higher risk of damage. Always practice on a less visible part of the shoe or a similar material first. If in doubt, consider professional restoration services.
Step 6: Preservation and Long-Term Storage
Once your Jordan 1s are clean and dry, proper storage is key to maintaining their condition over time.
Proper storage is the unsung hero of sneaker preservation. It protects your investment from environmental damage, dust, and accidental scuffs when you’re not wearing them. Following these tips can make a significant difference.
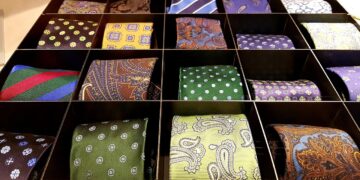
- Original Box or Sneaker Boxes: Storing your Jordans in their original shoeboxes or clear plastic sneaker display boxes protects them from dust and light.
- Avoid Extreme Temperatures: Store shoes in a cool, dry place away from direct sunlight, humidity, and extreme temperature fluctuations, which can degrade materials and adhesives.
- Use Shoe Trees: Cedar shoe trees help absorb moisture, prevent odors, and maintain the shoe’s shape.
- Display with Care: If you display your sneakers, ensure they are not in direct sunlight and are protected from dust. Rotate them periodically if they are on display for long periods.
- Regular Maintenance: Even when stored, giving your sneakers a quick wipe-down every few months can prevent dust buildup and catch any potential issues early.
Consistent care and proper storage will ensure your Jordan 1s remain a prized part of your collection for years to come.
Frequently Asked Questions
Can I use a magic eraser on my Jordan 1 soles?
Yes, a magic eraser is effective for cleaning white rubber soles and midsoles. However, use it gently and avoid painted areas or delicate finishes, as it can be abrasive if overused. Always test on a small area first.
How often should I clean my Jordan 1s?
The frequency depends on how often you wear them and the conditions. For daily wear, a quick wipe-down after each wear and a deeper clean every few weeks or when visibly dirty is recommended. For occasional wear, clean them before storing them away.
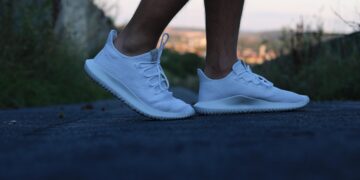
What is the best way to clean white leather Jordan 1s?
For white leather Jordan 1s, use a mild soap and water solution with a soft brush or cloth. Gently scrub, wipe away residue with a damp cloth, and air dry. For tough scuffs, a magic eraser can be used on the midsoles with caution.
Can I wash Jordan 1s in a washing machine?
No, absolutely not. Washing machines can severely damage the structure, materials, and adhesives of Jordan 1 sneakers. Always clean them by hand using the methods outlined in this guide.
How do I remove creasing from my Jordan 1s?
While you can’t entirely remove deep creases, you can minimize their appearance and clean dirt from them. Stuffing the shoes firmly and applying a leather conditioner after cleaning can help maintain shape and suppleness. For severe creases, consider professional restoration.
What if my Jordan 1s have stubborn stains?
For stubborn stains, start with the gentlest method possible. If mild soap and water don’t work, consider specialized cleaners for the specific material (leather, suede). For very tough issues like yellowing soles, specialized restoration products or professional help might be necessary.
Are there professional Jordan 1 cleaning services?
Yes, many cities offer professional sneaker cleaning and restoration services. These services are ideal for valuable or heavily soiled pairs where you want expert care. As of May 2026, professional cleaning can range from $30 to $100+ depending on the service and shoe condition.
Last reviewed: May 2026. Information current as of publication; pricing and product details may change.
Related read: Is Streetwear a Subculture in 2026? The Evolving Definition
Source: Vogue
Editorial Note: This article was researched and written by the Anarchy Label editorial team. We fact-check our content and update it regularly. For questions or corrections, contact us. For readers asking “How to clean jordan 1 sneakers at home”, the answer comes down to the specific factors covered above.


