


What is a Self Portrait, Really?
When we talk about a self portrait, we’re not just referring to a picture of yourself. It’s an artist’s deliberate act of creating a visual representation of themselves. This can span centuries, from ancient carvings to today’s digital art. Historically, mirrors and the growing interest in the individual fueled this practice, with artists like Jan van Eyck producing early panel self-portraits as far back as 1433.
Last updated: June 13, 2026
As of June 2026, the self portrait remains a potent vehicle for exploring identity, emotion, and societal commentary. It’s a conversation with oneself, translated onto canvas, paper, or screen. The intent goes beyond mere likeness; it’s about capturing an inner state, a chosen persona, or a reaction to the world around you.
Key Takeaways
- A self portrait is an artist’s depiction of themselves, dating back centuries.
- Modern self-portraits extend beyond traditional media to digital art and photography.
- The practice is a powerful tool for self-exploration, identity, and personal branding.
- Key elements include composition, lighting, symbolism, and the artist’s intent.
- Experimentation is crucial to developing a unique self-portrait style.
Why Artists Create Self-Portraits
The reasons behind creating a self portrait are as varied as the artists themselves. For many, it’s a deep dive into introspection. It’s a way to understand their own evolving identity, to document personal growth, or to confront inner feelings. Think of Frida Kahlo’s deeply symbolic and often raw self-portraits, which laid bare her physical and emotional pain.
Beyond personal reflection, self-portraits serve as a crucial part of an artist’s professional toolkit. According to a survey by the Art Institute of Chicago in 2025, over 60% of emerging artists use self-portraits for portfolio development and to showcase their technical skills and unique artistic voice. A well-executed self-portrait can communicate an artist’s capabilities more effectively than any other single piece.
Exploring Different Self-Portrait Mediums
The tradition of the self portrait is rich, but as of June 2026, the possibilities have exploded. While painting and drawing remain foundational, digital art and photography offer dynamic new avenues for self-representation.
Traditional Media: Think oil paints, watercolors, charcoal, and pastels. These mediums allow for a tactile experience and a depth of texture. The Renaissance masters perfected techniques here, and contemporary painters continue to push boundaries. For instance, a painter might spend weeks on a single oil self-portrait, meticulously layering glazes to achieve a luminous skin tone. The process itself is a form of meditation and deep focus.
Digital Art: With software like Procreate and Photoshop, artists can create stunning self-portraits on tablets or computers. This offers incredible flexibility, allowing for easy experimentation with color, form, and effects. A digital self portrait artist might layer textures, manipulate lighting digitally, or even create surreal, fantasy-infused representations of themselves. The ability to undo mistakes makes it forgiving for beginners.
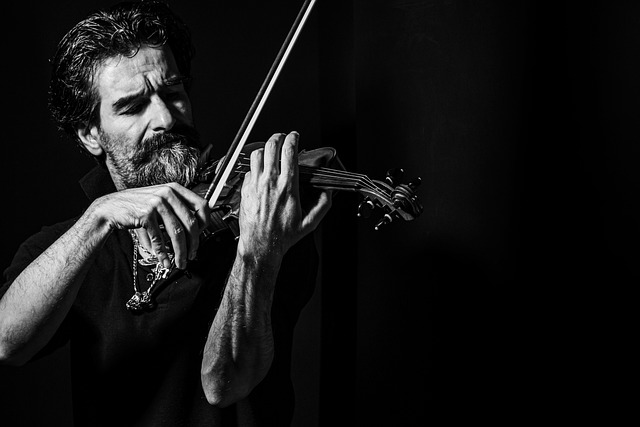
Photography: Self-portrait photography ranges from simple mirror selfies to elaborate conceptual shoots. It involves mastering composition, lighting, and often, post-processing. A photographer might use dramatic studio lighting to create a chiaroscuro effect, emphasizing their facial contours, or use natural light in an outdoor setting to evoke a specific mood. As of 2026, mobile phone cameras with advanced AI features also make sophisticated self-portraits more accessible than ever.
Composition and Lighting Secrets
The success of a self portrait hinges heavily on two fundamental elements: composition and lighting. These aren’t just technical choices; they are narrative tools that guide the viewer’s eye and convey meaning.
Composition: Where do you place yourself in the frame? Are you centered, or off to the side? The rule of thirds, where you divide your frame into nine equal parts and place your subject along the lines or at their intersections, often creates a more dynamic and engaging image than a perfectly centered one. Consider the background too – is it a plain studio wall, or does it add context? A cluttered background can detract from the subject, while a carefully chosen one can enhance the narrative.
Lighting: Lighting is crucial for shaping form and setting the mood. Natural light, like that from a window, often provides soft, flattering illumination. For a dramatic effect, consider using artificial light sources to create strong shadows and highlights, a technique known as chiaroscuro, famously used by artists like Rembrandt. Experiment with side lighting to accentuate bone structure, backlighting to create a silhouette, or front lighting for a more even, direct portrayal. The direction, intensity, and color temperature of light all significantly impact the final image.

Adding Symbolism and Meaning
A truly compelling self portrait often goes beyond the visual to incorporate layers of meaning. Artists use symbolism to communicate deeper aspects of their personality, experiences, or beliefs. This is where the self portrait transcends a mere likeness and becomes a personal statement.
Consider the use of objects. Is there a book, a tool, a flower, or an animal present? Each can carry symbolic weight. For example, an artist might include a wilting flower to represent a period of struggle, or a vibrant, blooming one to signify hope and renewal. Colors also speak volumes – blue might convey calmness or sadness, red passion or anger, and yellow joy or caution.
Van Gogh’s “Self-Portrait with Bandaged Ear” is a powerful example. The bandaged ear is a direct, visceral symbol of his mental and physical turmoil, intertwined with his artistic life. As of June 2026, artists continue to employ these visual languages, often blending personal iconography with universal themes to create resonance with their audience.
Practical Tips for Your Self-Portrait
Ready to create your own self portrait? Here are some practical tips to get you started, whether you’re a seasoned artist or a curious beginner:
- Find Your Light: Set up near a window for soft, directional light. Experiment with different times of day to see how the light changes.
- Use a Reference: A mirror is essential for drawing or painting. For photography, a tripod and timer, or a remote shutter, are invaluable so you can position yourself naturally.
- Choose Your Pose and Expression: What do you want to convey? A relaxed, natural pose often feels more authentic than an overly stiff or forced one. Think about your expression – a subtle smile, a thoughtful gaze, or a determined look can all tell different stories.
- Focus on Key Features: Pay close attention to the eyes, as they are often considered the windows to the soul. Ensure their placement and rendering are accurate.
- Don’t Fear Imperfection: Self-portraits are about capturing a moment in time, including your current state. Embrace any perceived flaws; they add character.
- Experiment with Color Palettes: Try monochromatic schemes for a unified feel, or use contrasting colors to highlight specific elements.
- Consider the Background: Keep it simple if you want the focus solely on you, or use it to add context and depth to your self-representation.
Common Mistakes and How to Avoid Them
Even experienced artists can fall into common traps when creating self-portraits. Awareness is the first step to avoidance.
Mistake: Incorrect Proportions. Often, artists struggle with accurately capturing the relative size and placement of features like eyes, nose, and mouth. Solution: Use a grid method for drawing or painting, or use the ‘sight-size’ method where you ensure the drawing/painting is the same size as the subject appears to you. In photography, trust your camera’s focus and composition tools.
Mistake: Flat Lighting. Overly flat or direct front lighting can make a portrait appear two-dimensional and lifeless. Solution: Introduce shadow. Use side lighting or a three-point lighting setup (key light, fill light, backlight) to create depth and dimension. Even simple natural window light, when placed to the side of your face, will add shape.
Mistake: Neglecting the Background. A busy or distracting background can pull attention away from the subject. Solution: Simplify. Blur the background using a shallow depth of field in photography, or use a neutral, monochromatic tone in painting. If the background is important, ensure it complements, rather than competes with, the portrait.
Mistake: Stiff or Inauthentic Expression. Trying too hard to look a certain way can result in a mask-like, unconvincing portrait. Solution: Relax. Listen to music, think of a pleasant memory, or engage in a calm activity before you start. Capture yourself in a moment of genuine thought or feeling, rather than a forced pose.
Developing Your Personal Style
Your self portrait is an opportunity to cultivate a unique artistic voice. This isn’t about perfection, but about developing recognizable traits in your work. As of June 2026, personal branding for artists is more important than ever, and your self-portrait style is a key component.
Experimentation is Key: Don’t be afraid to try new mediums, techniques, and subjects. Perhaps you find you excel at capturing intense emotional states through bold brushstrokes, or maybe your digital art is characterized by ethereal lighting and dreamlike qualities. The more you create, the more patterns will emerge.
Analyze Your Influences: Look at the self-portraits of artists you admire. What draws you to their work? Is it their use of color, their composition, their symbolic language? Try to deconstruct their methods and see how you can adapt elements into your own practice, rather than copying directly. A great example is the influence of Impressionist techniques on later portrait artists, who adapted the style to capture light and mood in their own ways.
Seek Feedback: Share your work with trusted peers or mentors. Constructive criticism can highlight strengths you might overlook and areas for improvement. A fellow artist might point out that your use of line is consistently energetic, or that your portraits tend to have a melancholic undertone, helping you identify your emerging style.
By consistently creating and reflecting on your work, you’ll naturally develop a signature style that makes your self-portraits uniquely yours. This journey of artistic self-discovery is ongoing and deeply rewarding.
Frequently Asked Questions About Self-Portraits
What is the main purpose of a self portrait?
The primary purpose of a self portrait is self-expression and exploration. Artists use them to understand and convey their identity, emotions, and perspectives, serving as a powerful tool for introspection and communication.
How much do art supplies for a self portrait typically cost?
Costs vary widely. Basic drawing supplies (pencil, paper, eraser) can be under $20. A set of oil paints and canvases might range from $100 to $300 initially. Digital art software and a tablet could be a significant upfront investment, potentially $300-$1000+, but offer long-term value.
Are self-portraits only for painters?
No, self-portraits are created across all artistic disciplines. Photographers, sculptors, digital artists, illustrators, and even writers (through autobiographical work) engage in self-portraiture to explore their identity and experiences.
How long does it take to create a self portrait?
The time investment varies greatly by medium and complexity. A quick charcoal sketch might take an hour, while a detailed oil painting could take weeks or months of dedicated work. Digital portraits can also range from an hour to many hours depending on detail.
What are some famous examples of self-portraits?
Iconic examples include Rembrandt’s numerous self-portraits capturing his aging process, Van Gogh’s emotionally charged works, Frida Kahlo’s symbolic explorations of pain and identity, and Albrecht Dürer’s Renaissance self-portraits that assert the artist’s status.
How can I make my self portrait look more realistic?
Focus on accurate proportions, realistic shading to capture form, and subtle details in the eyes and skin texture. Careful observation of light and shadow is crucial. Practice and understanding anatomy will also significantly improve realism.
Last reviewed: June 2026. Information current as of publication; pricing and product details may change.


