




A scarf top is a custom-tied garment formed by folding and wrapping a textile around the chest and waist. Alternatively, it is a pre-stitched blouse that mimics this tied aesthetic. Typically crafted from silk, satin, or lightweight cotton, it transforms an accessory into a backless halter, bandeau, or one-shoulder shirt.
What is a scarf top and how does it work?
At its core, a scarf top turns a fabric square into a wearable top. It uses strategic folding, wrapping, and knotting. The primary design relies on tension, drape, and knot placement to hold the fabric securely around your bust, ribs, and shoulders. You can convert a single piece of fabric into multiple silhouettes without sewing, cutting, or making permanent changes to the fabric.
While DIY wrapped scarves are the traditional version of this garment, clothing brands also produce pre-constructed scarf tops. These manufactured versions feature pre-sewn hemlines, elastic backs, built-in lining, or adjustable straps. So, you get the visual draped effect of a silk scarf with the structured stability of a conventional blouse. Whether built from scratch using a vintage silk square or bought ready-to-wear, the scarf top offers effortless fluidity and silhouette customization that tailored shirts cannot match.
Choosing the right fabric, weave, and scarf size
The outcome of a tied scarf top depends almost entirely on the dimensions and material of the fabric square you start with. Using a scarf that is too small leads to excessive pulling, slipping knots, and unexpected exposure. Meanwhile, overly heavy fabrics create bulky, unmanageable knots around your neck and spine.
Scarf dimensions and coverage options
Square scarves are the standard shape for transforming fabric into tops. Rectangular scarves can work for wrapped bandeau styles, but square textiles offer balanced geometry for symmetry across the torso.
- 24×24 inches (60×60 cm): Suitable only for petite frames, bandeau styles, or small bust sizes (A to B cups). This size provides minimal coverage and leaves the back completely exposed.
- 35×35 inches to 36×36 inches (90×90 cm): The versatile industry standard (often referred to as a classic silk carré). This dimension yields adequate coverage across the bust. It allows full-coverage triangle halter ties and provides enough fabric tail to tie double knots behind the waist. Fits bust sizes A through C comfortably.
- 42×42 inches to 44×44 inches (110×110 cm to 120×120 cm): Recommended for larger bust sizes (D cup and above) or for wearers seeking additional stomach and back coverage. Also, the extra surface area allows deeper cowl necklines, wider wrap angles, and longer, more secure tie tails.
Selecting the best fabrics for drape and grip
Fabric choice influences how the top drapes across the chest. It also affects how securely the knots remain tied throughout the day.
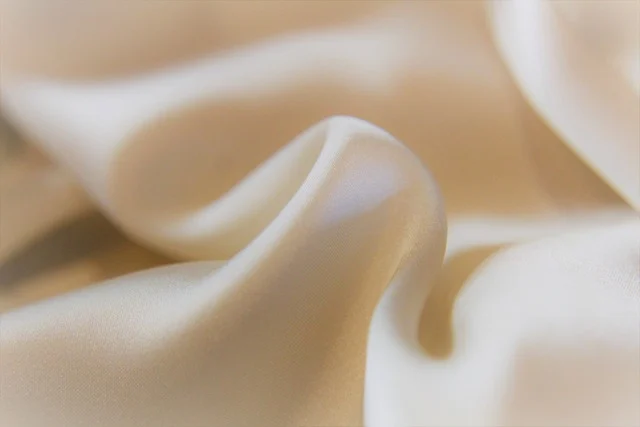
- Silk Twill (16 to 19 momme): The premier fabric for scarf tops. Silk twill has a subtle diagonal weave texture that creates friction, helping knots hold firmly without slipping. It provides opacity and a soft luster without being overly slick.
- Silk Habotai and Satin: Silk habotai offers a featherlight feel and airy drape, ideal for warm weather. Polyester satin and silk satin offer high shine and fluid movement, though their slippery surface requires tighter double-knotting or rubber band anchors.
- Cotton Lawn and Linen: Fine cotton lawn and soft linen scarves offer zero slip, maximum knot security, and high breathability. They create a matte, structured look that pairs naturally with casual summer attire.
- Fabrics to Avoid: Heavy wool, cashmere, thick jacquards, stiff organza, and heavy synthetics. Heavy fibers fail to drape smoothly over the bust and create large, uncomfortable knots where tied against skin or vertebrae.
Who tied scarf tops do not suit
While adaptable, tied DIY scarf tops are not ideal for everyone or every situation. They offer no built-in architectural support, structure, or underwire. If you rely on firm bust support, high back coverage, or strict modesty, unlined tied scarves can feel insecure without specialized undergarments like boob tape or strapless convertible bras.
Tied scarf tops are also ill-suited for physical activities, wind-heavy environments, or conservative professional settings where exposed backs or unravelling knots present a risk. For those contexts, a pre-constructed scarf-style top with internal boning or sewn shoulder straps is a practical alternative (see What is Fashion Trend? Your Guide to Emerging Styles for top styles).
How to tie a scarf top: Step-by-step methods
Transforming a square scarf into a secure top requires step-by-step precision. Practice these core folding and knotting techniques using a 36×36-inch silk or satin square in front of a mirror.
The classic triangle halter neck
This foundational style covers the chest completely while leaving the back open. It works particularly well with high-waisted bottoms.
- Lay your square scarf flat on a clean surface with the pattern facing down.
- Fold the scarf diagonally in half to form a large triangle.
- Hold the top folded edge across your chest so the point of the triangle hangs down over your belly button.
- Take the two acute side corners, cross them behind your lower back, and tie them in a tight square knot.
- Take the two top corners of the triangle fold. Bring them up to the nape of your neck, and tie a firm double knot behind your neck. Adjust the front panel flat across your bust.
The straight bandeau top
A sleek, strapless option designed for minimal coverage under blazers or with summer shorts.
- Fold your square scarf in half diagonally to form a triangle.
- Starting from the bottom point of the triangle, roll or fold the fabric upward in 3-inch horizontal accordion folds. Continue until you create a thick rectangular band.
- Place the center of the band across your bust line.
- Wrap the two long tails around to the middle of your back.
- Pull the tails firmly to create tension across the chest. Next, tie a flat square knot in the center of your back. Tuck the loose ends inside the band for a clean finish.
The asymmetrical one-shoulder fold
A modern silhouette that anchors over one shoulder for an elevated, architectural appearance.
- Fold your square scarf diagonally to form a broad triangle.
- Drape the scarf across your chest so the diagonal fold line runs diagonally from over your left shoulder down toward your right hip.
- Take the corner hanging over your left shoulder and one top edge corner, pulling them together behind your neck to tie a neat knot on the back left shoulder blade.
- Gather the remaining side corners around your natural waist and secure them with a double knot at the right side of your back.
The keyhole neck halter
This method adds a knotted focal point directly above the chest, creating a refined keyhole cutout.
- Fold your scarf into a triangle.
- Gather the top folded edge at the middle point and tie a small single knot right in the center of the fabric.
- Position this center knot high on your sternum, just below the collarbone.
- Pass the two top neck tails around the back of your neck and tie them securely at the nape.
- Wrap the two lower corners around your midsection and tie them behind your back at waist height.
The back-knot cowl front
This technique creates a draped, elegant cowl front while anchoring the weight across your neck and torso.
- Hold an open square scarf by two adjacent top corners (without folding it into a triangle).
- Tie these two top corners together in a small knot behind your neck, letting the loose fabric fall into a natural cowl drape across your chest.
- Gather the two lower corners of the square, pull them tightly around your lower back, and tie a double knot to secure the bottom hem against your stomach.
How do scarf tops compare to traditional tops?
Evaluating how a scarf top performs against standard retail blouses, halter tops, and bandeaus helps determine which garment best serves your immediate plans.

| Feature / Metric | DIY Tied Scarf Top | Pre-Constructed Scarf-Style Top | Traditional Halter or Bandeau Top |
|---|---|---|---|
| Bust Support | None; relies entirely on tied fabric tension. | Moderate; often includes lining, elastic, or soft cups. | High; structured seams, elastic bands, or underwire. |
| Sizing Adjustability | Fully customizable; fits multiple body shapes. | Fixed numerical/letter sizing (S, M, L). | Fixed numerical/letter sizing. |
| Versatility | High; converts into tops, neck scarves, or hair wraps. | Low; functions only as a single shirt silhouette. | Low; single-purpose garment. |
| Knot Security | Requires monitoring or double-knotting techniques. | High; held by sewn seams, zippers, or clasps. | High; permanent construction. |
| Storage & Travel | Folds completely flat; ultra-lightweight. | Standard garment weight and storage space. | Standard garment weight and storage space. |
Solving common scarf top problems: Security, support, and bra coverage
Because DIY scarf tops rely on knot tension rather than tailored tailoring, specific adjustments prevent slippage, awkward gapes, and mid-day adjustments.

Preventing knots from slipping on silky fabric
Satin and high-luster silk can slide loose over time under body movement. Avoid simple single knots, which slowly untie under tension.
- Use clear elastic hair bands: Before tying the fabric tails together, slip a tiny clear elastic rubber band over the ends. Next, tie the knot over the band; the rubber creates a stop-block that prevents the silk from sliding back through the knot.
- Double knot with square knots: Always complete a true square knot (left over right, then right over left) rather than a granny knot, which slips easily under tension.
- Apply double-sided fashion tape: Place strips of medical-grade double-sided fashion tape along the inner top rim of the scarf top and press it directly onto clean, dry skin. This prevents gaping when leaning forward.
Achieving bust support and preventing spillover
For bust sizes D-cup and larger, achieving adequate lift and containment without built-in bra cups requires strategic wrapping and hidden foundations.
- Upsize the scarf: Upgrade from a standard 36-inch scarf to a 44-inch (120 cm) square. The additional fabric width lets you pull the side panels further under the armpits, eliminating side-bust spillover.
- Cross-wrapping for lift: When tying a triangle halter, cross the top neck straps tightly over the front of the throat before bringing them behind the neck. This creates a criss-cross front frame that lifts the bust inward and upward.
Choosing the right undergarments
Because most tied scarf tops leave the back fully exposed, traditional bras with back bands will show.
- Adhesive silicone bras: Ideal for smooth front shaping and modest nipple coverage without back straps.
- Boob tape / Body tape: Offers custom lift and contouring that remains invisible under plunging necklines or completely open-back fold styles.
- Convertible strapless bras: If wearing a pre-constructed scarf top or layering under a blazer, a low-back strapless bra provides structural underwire support.
How to style a scarf top for different occasions
The fluid, eye-catching texture of a printed or solid silk scarf top makes it a striking focal piece. Pairing it with structured, high-waisted bottoms balances its minimalist proportions.
Casual daytime outfits
Pair a printed silk bandeau or triangle halter top with high-waisted wide-leg denim jeans or relaxed linen trousers. The structured denim or textured linen anchors the smooth silk. Complete the look with flat leather slides, minimal gold hoop earrings, and a woven tote bag. This combination creates a balanced outfit suitable for weekend brunches or warm-weather travel.
Evening and dinner wear
For dinner or night events, choose a deep jewel-toned or monochromatic black satin scarf top. Tie it in an asymmetrical one-shoulder or keyhole halter shape. Combine it with tailored high-waisted trousers, a liquid silk slip skirt, or sleek leather pants. Finish with pointed heel pumps, a structured clutch, and layered delicate chains.
Resort wear and beach styling
Scarf tops excel as vacation wardrobe pieces due to their lightweight packability. Tie a brightly patterned cotton or silk square as a bandeau over your swimsuit, paired with a high-waisted sarong skirt or wide-leg beach pants. Add leather sandals and a wide-brim straw hat for poolside or seaside dining.
Layering with blazers and button-down shirts
To adapt a scarf top for cooler weather or modest settings, wear it underneath an oversized structured blazer or an unbuttoned crisp white cotton shirt. The silk print peeking out from behind tailor-cut lapels provides visual contrast while keeping back exposure covered. Social platforms like TikTok frequently showcase this tailored-meets-fluid contrast for everyday city wear.

Sourcing vintage scarves and eco-friendly options
Transforming vintage silk scarves into tops is an inherently sustainable fashion choice. Repurposing pre-owned textiles extends the lifecycle of existing materials. As a result, it eliminates the water and chemical consumption associated with new garment manufacturing.

When searching for vintage scarves at estate sales, thrift shops, or online vintage retailers, evaluate these specific criteria before purchase:
- Fabric integrity: Gently stretch the scarf along the bias to check for dry rot or brittle fibers, which can snap when pulled tightly into knots.
- Hems and edges: Look for hand-rolled edges, which indicate high-quality craftsmanship and resist fraying under knot pressure better than machine-stitched hems.
- Stain check: Inspect printed panels under bright light for water spots or perfume stains, particularly along the center panel that will cover your bust.
Garment care: How to wash, iron, and store silk scarves
Proper maintenance preserves the vibrant dyes and structural strength of silk and satin scarves after repeated tying.
Washing silk and satin fabrics
Never machine-wash fine silk scarves unless specified on the care tag. Hand-wash silk in a clean basin filled with cool water and a few drops of pH-neutral silk detergent or mild baby shampoo. Submerge the fabric, gently swish it for 60 seconds, and rinse thoroughly in cold water. Do not wring or twist the fabric, as wringing breaks fine silk filaments.
Drying and pressing
Press excess water out by laying the scarf flat on a clean white towel. Roll the towel up gently. Unroll and lay the scarf flat on a drying rack away from direct sunlight, which causes silk dyes to fade. To remove wrinkles, iron the reverse side of the slightly damp scarf using the lowest silk iron setting. Place a clean cotton pressing cloth between the iron and the silk.
Storage practices
Never store your scarf tied in a top knot; untie it immediately after wearing to relax the fibers. Store scarves loosely rolled or folded flat in a breathable cotton pouch or drawer away from moisture and direct light.
Sources: Scarf
Frequently asked questions
What size scarf is best for making a top?
A 35×35 inch (90×90 cm) square scarf is the ideal standard size for most body types and tying styles. Smaller 24-inch squares work only for minimal bandeaus, while 42-inch or 44-inch squares provide extra coverage for larger busts.
How do I stop my scarf top from slipping down?
Secure knots using double square knots, anchor slippery silk tails with clear elastic hair ties before knotting, and apply double-sided fashion tape along the front chest line to adhere the fabric to your skin.
What bra should I wear under a backless scarf top?
Adhesive silicone cups or medical-grade body tape work best because they offer lift and coverage without exposing back straps. Strapless convertible bras can also work if you layer the top under a blazer.
Can I turn a rectangular scarf into a scarf top?
Yes, long rectangular scarves can be wrapped around the chest and tied into strapless bandeau or cross-front halter styles, though square scarves provide more balanced geometry for traditional triangle halter tops.
Are silk or synthetic scarves better for tying tops?
Silk twill is ideal because its textured diagonal weave offers moderate grip so knots hold firm. Synthetic satins work well for affordability, but require rubber bands or fashion tape to prevent slipping due to their slicker surface.