




Finding the best keratin treatment at home kit depends on your hair texture and tolerance for processing time, with formaldehyde-free options like Keratin Complex Infusion and Cocochoco Professional leading the market. These DIY systems fill cuticle gaps to eliminate frizz, boost shine, and keep hair smooth for 4 to 12 weeks.
Achieving smooth, manageable hair without spending hundreds of dollars at a salon has driven significant innovation in DIY hair care. Modern at-home keratin kits replicate professional smoothing protocols by combining protein-rich formulas with targeted heat application. While salon treatments cost anywhere from $200 to $600 per visit, at-home kits generally cost between $50 and $150, making high-level frizz control far more accessible.
However, selecting the best keratin treatment at home kit requires a clear understanding of active ingredients, hair porosity, and application mechanics. A formula that performs miracles on coarse, high-density curls might weigh down fine or low-porosity strands. Knowing how these treatments alter the hair shaft ensures you select the right product and achieve safe, long-lasting results.
How do at-home keratin treatments work on hair structure?
It forms the outer cuticle scales and inner cortex bonds that govern elasticity, strength, and moisture retention. Daily exposure to hot styling tools, chemical processing, ultraviolet radiation, and environmental friction degrades this protein matrix, stripping away natural lipids and raising the cuticle layer.
When the cuticle lifts, moisture escapes from the inner core while atmospheric humidity penetrates the strand. This swelling causes individual fibers to push against each other, creating visible frizz, tangles, and dullness. At-home keratin kits work by infusing synthesized hydrolyzed keratin, amino acids, or organic acids directly into these open structural gaps.
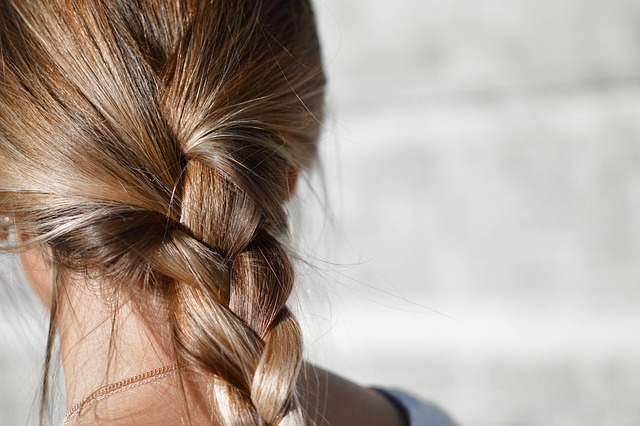
The treatment process relies on a two-part mechanical and chemical sequence. First, a clarifying wash removes surface oil, silicones, and mineral buildup to expose the compromised cuticle. Once the keratin formulation is applied, a flat iron delivers controlled thermal heat. This thermal energy cross-links the protein molecules to the hair shaft and flattens the cuticle layer shut, sealing moisture inside and locking out external humidity.
Unlike permanent chemical relaxers containing sodium hydroxide or ammonium thioglycolate, keratin treatments do not break disulfide bonds permanently. They act as a semi-permanent protective coating that slowly fades over several weeks as you wash your hair.
What types of at-home keratin kits exist?
At-home smoothing systems vary widely based on chemical active ingredients, processing requirements, and target hair textures.
Formaldehyde-releasing vs. formaldehyde-free formulas
Traditional keratin protocols relied on formaldehyde or formaldehyde-releasing compounds (such as methylene glycol or formalin) to lock hair into a straight, frizz-free alignment under high heat. While effective at straightening tight curls, formaldehyde gas released during flat ironing poses health risks, including eye irritation, headache, and respiratory distress.
Most consumer at-home kits now use formaldehyde-free active ingredients like glyoxylic acid, carbocysteine, or oxoacetamide amino acids. These organic acids reconfigure hydrogen bonds safely when heated, smoothing frizz and softening texture without dangerous fumes. While formaldehyde-free alternatives may offer slightly less curl reduction on coarse, resistant textures, they provide a far safer environment for home application.
Express vs. traditional deep-smoothing treatments
- Express Kits: Designed for rapid application, taking 30 to 60 minutes from start to finish. These formulas use lighter protein concentrations or leave-in serums that seal instantly under low-to-medium heat. They reduce frizz and boost gloss for 4 to 6 weeks, making them ideal for quick maintenance or finer hair textures.
- Traditional Kits: Require 2 to 3 hours of intensive labor, including meticulous sectioning, extended dwell times, and repeated high-heat flat ironing passes. Traditional treatments yield heavy-duty frizz reduction and texture softening that lasts 8 to 12 weeks.
Formulations matched to hair texture
- Fine or Thin Hair: Formulated with lightweight hydrolyzed wheat or silk proteins that coat strands without causing limpness or root collapse.
- Coarse, Thick, or Resistant Hair: Formulated with higher concentrations of amino acids and keratin to penetrate dense cuticle layers.
- Color-Treated or Bleached Hair: Blended with restorative lipids, panthenol, and lower pH balances to protect compromised structural integrity and prevent color fading.
- Curly or Coily Hair: Formulated to preserve natural curl patterns while removing surface frizz and expanding manageability, rather than forcing hair bone-straight.
How do the top at-home keratin kits compare?
The table below compares the primary features of top-rated at-home keratin treatments:
| Product Name | Active Smoothing Agent | Duration | Ideal Hair Type | Processing Time |
|---|---|---|---|---|
| Keratin Complex Infusion Replenisher | Hydrolyzed Keratin & Wheat Protein | 4 to 6 weeks | All hair types, fine to medium | 30 – 45 minutes |
| Cocochoco Professional Treatment | Keratin Derivatives & Organic Oils | 10 to 12 weeks | Thick, coarse, extremely frizzy | 2 – 3 hours |
| GK Hair The Best Keratin Treatment | Juvexin (Anti-Aging Keratin Blend) | 8 to 12 weeks | Color-treated, damaged, medium hair | 1.5 – 2 hours |
| Mini-Keratin Express Treatment | Hydrolyzed Silk & Keratin Amino Acids | 4 weeks | Fine, wavy, lightly frizzy hair | 30 minutes |
| Pravidla Professional Treatment | Botanical Extracts & Amino Acids | 6 to 8 weeks | Sensitive scalps, gently frizzy hair | 1 to 1.5 hours |
1. Keratin Complex Infusion Keratin Replenisher
Keratin Complex is a benchmark brand in professional salons, and its at-home Infusion system brings that expertise into personal care routines. This blow-dry heat-activated treatment deposits concentrated protein deep into damaged cuticle gaps, boosting strength while smoothing humidity-induced frizz.
- Pros: Fast application; non-greasy formula; suitable for color-treated and fine hair; noticeable gloss boost.
- Cons: Higher price per ounce; shorter duration (4-6 weeks) than heavy chemical systems; requires precise blow-dry heat application.
- Who it is NOT for: Individuals seeking complete curl straightening on tight, coarse Type 4 hair.
2. Cocochoco Professional Keratin Treatment
Cocochoco delivers an intense smoothing formula engineered for maximum longevity and severe frizz suppression. Free from formaldehyde, it utilizes pure keratin extracts alongside plant-derived conditioning agents to soften harsh textures and restore reflective shine.
- Pros: Long-lasting results (up to 3 months); exceptional frizz reduction on high-density hair; pleasant aroma during application.
- Cons: Time-consuming 3-hour application protocol; requires strict 72-hour post-treatment dry period; heavy formula can flatten fine hair.
- Who it is NOT for: Fine, limp hair that lacks natural volume, or users unwilling to observe a multi-day post-application wash rule.
3. GK Hair The Best Keratin Treatment
GK Hair features Juvexin, a protein blend derived from wool that restores hair from the inside out. It excels at multi-benefit action: smoothing unmanageable texture while working to repair internal thermal damage.
- Pros: Highly effective on color-treated and bleached hair; customizable processing times depending on desired curl reduction; leaves hair noticeably stronger.
- Cons: Formula can alter blonde tone slightly if flat iron heat is set too high; moderate chemical smell; premium price point.
- Who it is NOT for: Anyone who does not own a temperature-controlled flat iron capable of consistent thermal output.
4. Mini-Keratin Express Smoothing Treatment
Mini-Keratin Express is formulated as a user-friendly entry option for smoothing beginners. It simplifies the multi-step process into a single wash, treat, and seal routine that takes under 45 minutes.
- Pros: Affordable price tag; rapid application; straightforward instructions; ideal touch-up treatment between major salon visits.
- Cons: Short longevity (about 4 weeks); minimal curl reduction; washes out quickly if exposed to saltwater or sulfates.
- Who it is NOT for: Coarse, tightly coiled textures requiring deep structural straightening.
5. Pravidla Professional Keratin Treatment
Pravidla combines hydrolyzed keratin with gentle botanical oils and plant proteins to minimize scalp irritation and harsh odors. It targets moderate frizz while keeping hair light and touchably soft.
- Pros: Minimal fumes; gentle on sensitive skin and compromised scalps; leaves natural movement intact.
- Cons: Moderate smoothing power; shorter lifespan on thick hair; less widely available in retail outlets.
- Who it is NOT for: Extremely dense, coarse hair that resists botanical smoothing agents.
How do you choose the right kit for your hair?
Selecting the optimal kit requires evaluating five physical hair traits and safety factors:
- Hair Density and Texture: Thick, coarse hair requires deep-penetrating traditional formulas like Cocochoco or GK Hair. Fine hair benefits from express formulas or Keratin Complex, which prevent oiliness and retain body.
- Porosity Level: High-porosity hair (damaged by bleaching or chemical heat) absorbs product rapidly but bleeds protein quickly. It requires kits rich in amino acids and gentle sealing protocols. Low-porosity hair needs thoroughly clarifying pre-treatments so the protein can enter the cuticle.
- Chemical History: If your hair has recently been lightened, relaxed, or colored, opt for gentle, low-pH formulas designed for processed hair to avoid protein overload and breakage.
- Active Ingredients: Read bottle labels carefully. Choose products containing glyoxylic acid, hydrolyzed keratin, silk amino acids, or carbocysteine over methylene glycol or formaldehyde derivatives.
- Who Should Avoid At-Home Keratin: Do not perform an at-home treatment if you have active scalp psoriasis, eczema, open abrasions, or severely damaged hair that snaps off when stretched wet. Pregnant or nursing women should consult a physician before using heat-activated chemical formulations.
Step-by-step guide: applying a keratin treatment at home
Achieving smooth, long-lasting smoothness requires absolute discipline during application. Follow this multi-step process carefully:
- Perform a Strand and Patch Test: Apply a small drop of treatment behind your ear to test for allergic reactions. Apply product to a hidden 1-inch section of hair, dry, and flat iron to verify color stability and structural response.
- Wash with Clarifying Shampoo: Wash hair twice with a dedicated clarifying shampoo. Do not use regular shampoo, and do NOT apply conditioner. Clarifying lifts the cuticle and strips away styling oils.
- Dry Hair Completely: Towel dry thoroughly, then blow-dry hair to 80%–100% dry (follow specific kit guidelines). Removing excess moisture ensures the solution isn’t diluted.
- Section the Hair: Divide dry hair into four clean quadrants using non-metallic hair clips.
- Apply the Keratin Solution: Put on protective gloves. Working in 1-inch sub-sections, apply product with a tint brush, starting 1/4 inch away from the scalp down to the ends. Comb through with a fine-tooth comb to remove excess product. Hair should be damp with solution, never dripping.
- Process for Required Time: Allow the formula to saturate the hair for the time indicated by the manufacturer (typically 20 to 60 minutes).
- Blow-Dry Smooth: Blow-dry hair completely straight on medium heat using a round brush or paddle brush until 100% dry.
- Flat Iron to Seal Keratin: Section hair again. Pass a flat iron over clean 1/8-inch sections slowly from root to tip. Set iron temperature according to hair type:
- Fine / High-Lift Bleached Hair: 380°F to 400°F (190°C to 200°C) — 4 to 6 passes.
- Normal / Color-Treated Hair: 410°F to 420°F (210°C to 215°C) — 6 to 8 passes.
- Coarse / Thick Natural Hair: 430°F to 450°F (220°C to 230°C) — 8 to 10 passes.
- Observe Post-Treatment Rinse Guidelines: Some kits require rinsing immediately after flat ironing, while traditional systems demand leaving the product untouched for 48 to 72 hours before the first wash.
Always work in a room with open windows, high cross-ventilation, or an active exhaust fan to prevent fume inhalation during the blow-drying and flat ironing phases.
What common mistakes ruin at-home keratin results?
Avoid these five critical mistakes during application:
- Applying Product Directly to the Scalp: Saturating the scalp causes product buildup, clogged hair follicles, itchiness, and a greasy appearance. Always stay 1/4 inch away from the skin.
- Over-Saturating the Hair: Applying too much keratin solution causes smoking during blow-drying and leaves hair stiff, sticky, and gummy. Less product evenly distributed yields far better results.
- Inconsistent Flat Iron Heat or Speed: Moving the flat iron too quickly or using a tool with uneven heat distribution fails to lock the protein into the cuticle, resulting in patchy frizz reduction that washes away in days.
- Washing Hair Too Early or Bending Strands: For treatments requiring a 72-hour wait time, putting hair in a ponytail, wearing hats, tucking hair behind ears, or getting strands wet creates permanent dents in the freshly sealed protein matrix.
- Skipping Ventilation: Ignoring airflow during the high-heat flat ironing phase allows chemical vapors to accumulate, causing eye stinging and respiratory discomfort.
How to extend your keratin treatment aftercare
Proper aftercare determines whether your treatment lasts four weeks or three months.
- Switch to Sulfate-Free and Sodium Chloride-Free Products: Sodium lauryl sulfate and sodium chloride (salt) aggressively strip keratin coatings from the hair shaft. Choose gentle cleansers formulated for keratin-treated hair. The American Academy of Dermatology highlights that gentle cleansing is vital for retaining hair health and prolonging salon and DIY treatments.
- Protect Hair from Water Exposure: Chlorinated swimming pools and ocean saltwater break down protein bonds rapidly. Apply a leave-in conditioner or hair oil before swimming, wear a cap, and rinse hair immediately with clean fresh water afterward.
- Deep Condition Weekly: Apply a protein-free, moisture-rich deep conditioning mask once a week to maintain moisture balance without causing protein overload.
- Minimize Direct Thermal Stress: Although keratin reduces blow-dry time significantly, using flat irons daily at high temperatures degrades the protein shield faster. Always apply a heat protectant when styling with hot tools.
Frequently asked questions
Are at-home keratin treatments safe for damaged or bleached hair?
Yes, provided you choose a formaldehyde-free formula specifically formulated for damaged hair and keep flat iron temperatures below 400°F (200°C). Bleached hair is highly porous, so performing a strand test before full application is essential to prevent heat damage or breakage.
How long do results last, and how often can you repeat the treatment?
At-home keratin results typically last between 4 and 12 weeks depending on the product, hair washing frequency, and aftercare. Treatments can be safely repeated every 6 to 8 weeks once the previous coating has naturally faded from the hair shaft.
Will an at-home keratin treatment permanently straighten natural curls?
No, keratin treatments are semi-permanent smoothing systems that wash out gradually without permanently breaking chemical hair bonds. They loosen curl patterns and eliminate frizz, but natural texture returns fully as the protein washes away over time.
What should you do if your hair feels heavy or greasy after treatment?
If your hair feels sticky or weighed down after application, you likely over-applied the liquid or didn’t rinse sufficiently. Wash your hair with a mild, sulfate-free shampoo after the designated waiting period to clean away excess product residue from the hair surface.